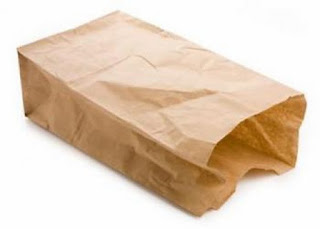
This past Sunday I needed to vacuum as I clean my house from top to bottom this time of year. Sunday's are big days when it's the only day you're at home all day, so I have to use every minute pretty wisely to have a productive day. I opened the vacuum to put a new bag in it when....BOOM, the gauntlet fell, I remembered that I had used my last bag when it filled and failed to purchase new vacuum bags, so I was bagless! I didn't really have time to go to Wal-Mart or anywhere else that carried vacuum bags....that would cut out about one hour of my day to do that and that was time I didn't have, so I decided to try a brown paper bag with a piece of rubber band and two hair bands wrapped around it as the holder in place. I wasn't sure if it would work because vacuums have a lot of pressure when they are sucking, but it worked and I got several rooms vacuumed with one bag before it filled. ....sooooo from now on, no more buying vacuum bags for me....I will save a few bucks by just using what I already have....paper bags. I use to hold on to plastic bags....well I still do....but now I'll add smaller paper bags to the mix. This turned out to be one of those lemons that turned to yummy lemonade. :-)!
Here's the "how to" if you want to try......
You'll need one paper bag....not too big and not too small. Make sure it has no holes in it. I used a bag the size of what would hold two wine bottles if that helps for those who prefer visuals.
I took a medium sized rubber band, doubled it, and put it around the opening of the bag. (side note: if you can triple the rubber band that's better, but you
don't want to accidentally break the rubber.....make sure your rubber
band is not a thin one that will break easily, but also make sure it's
not one of the super thick ones that you can't double over. Medium sized ones work well.) Next I took two elastic hair bands with no metal, just the simple ones that you can get at a dollar store or anywhere easily as shown below, and also doubled the hair bands around the opening of the bag on top of the rubber band. Then I took my fingers and pulled the bag opening open wide enough with the bands all around it, and placed the bag opening over the opening to where you'd put a vacuum bag, and pulled the rubber band and the two elastic hair bands down tight to make sure the bag fit firmly around the vacuum bag opening as it would a regular vacuum bag. Voila, the vacuum was ready for use. After I ran it for a few seconds the first time, I turned it off and opened it to make sure the bag hadn't fallen off, and to make sure that the bag hadn't busted or exploded open. It hadn't. Whew! All was well, and I got a good portion of the house vacuumed with my free paper bag vacuum bag. Not rocket science at all and it's a good thrifty feeling when you throw your homemade vacuum bag in the trash! :-)


No comments:
Post a Comment