Most people know how I absolutely have a fondness for specialty teas and tea mugs! Last week a great family here that I really admire (they set such a great example in what a family is suppose to be like) gave me the gift of this wide mouth mug with the giant sunflower on it. (The pic doesn't show how wide the mouth of this mug actually is...holds a lot of tea at once! To me sunflower's picture happiness, so combine that with my liking for gourmet teas and this is one of the best gifts ever. I'm using my mug at home and enjoying my tea in it! Thanks so much to the family who thought of me and got me this!
Tuesday, January 17, 2012
Thursday, January 5, 2012
Unavailable Set Update
Giraffe Toddler Set sold locally so took out of listing online. Not available in my online Etsy Shop anymore.
Monday, January 2, 2012
SUGAR FREE Healthy Strawberry Dessert
I spent this past Sunday creating new designs in sewing and creating new healthy food recipes. A successful and productive Sunday.
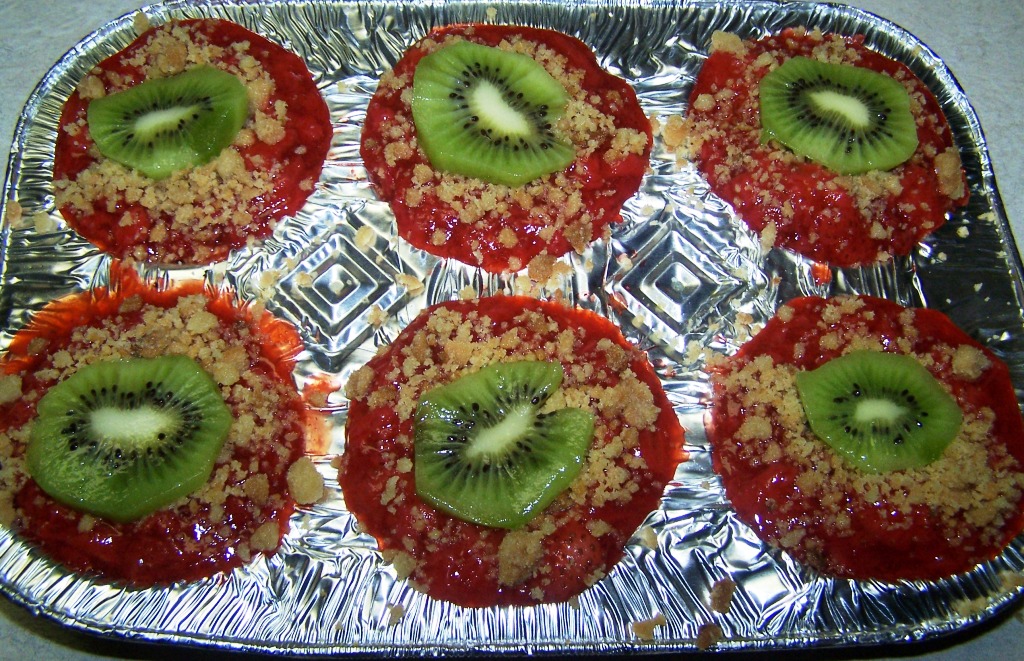
Still staying completely away from sugar and figuring out how to make desserts that taste just as great using a natural sweetener, Stevia, I was able to come up with a fun and flashy :-) dessert this past weekend. Here is a picture of the finished dessert! Smelled and tasted delicious. Here's how I made it......
Mixed about 1 teaspoon of corn starch in with a little bit of water and set aside. (Corn starch is the main thickening agent in this dessert.)
A few weeks back I had tried my hands at creating a pasty using rice flour that turned out to be a total flop, so I crushed the pastry and put in the freezer. This past weekend, I took the crushed crumbs out of the freezer and decided to use it as my crust for my strawberry treats. (The pastry was made just using common sense.....water, rice flour, olive oil, and a tiny, tiny pinch of stevia...kneaded the pastry into balls and baked in oven for about 30 minutes I think.)
I packed the rice flour crumbs into a muffin tin to form a crust.
Then, I cut up a few whole strawberries into 4 quarter pieces and placed them on top of my rice flour crumb crust.
Here is a photo of the kind of stevia that I use to bake with. You have to get this kind of pure stevia either from ordering it online, or going to a health food store, but it's worth it...Zero calories, and all natural made from vegetables!
Next, over medium heat, I mashed up about 25 ounces of strawberries in a sauce pan, and added a pinch of stevia to it to sweeten it. (Turns out 25 ounces of strawberries was way too much and I have about half of my cooked strawberry mixture left and now sitting pretty in my freezer waiting to be used for something else. I would say you only 16 ounces of strawberries to successfully make this dish fit into 6 muffin tins.)
Once the strawberries had come to a boil in their own juice, I added, not all, but a bit of my corn starch and water mixture that I had made earlier stirring it constantly and adding the corn starch mixture until the strawberries had thickened to a desired thickness.
Then I poured the thickened and cooked strawberry mixture over the cut up whole strawberries and the crust, cut up a kiwi and garnished, then covered and let set in the frig overnight.
In the morning when I checked out my dessert, it had thickened completely and was ready to eat, so it was my breakfast! Tasted yummy and is very low in calories and made from completely healthy ingredients. Who said dessert has to be unhealthy?! :-) This picture and the next two pics are the up close and personal yummy finished result!
YUMMY Green Bean and Ground Beef Meal!
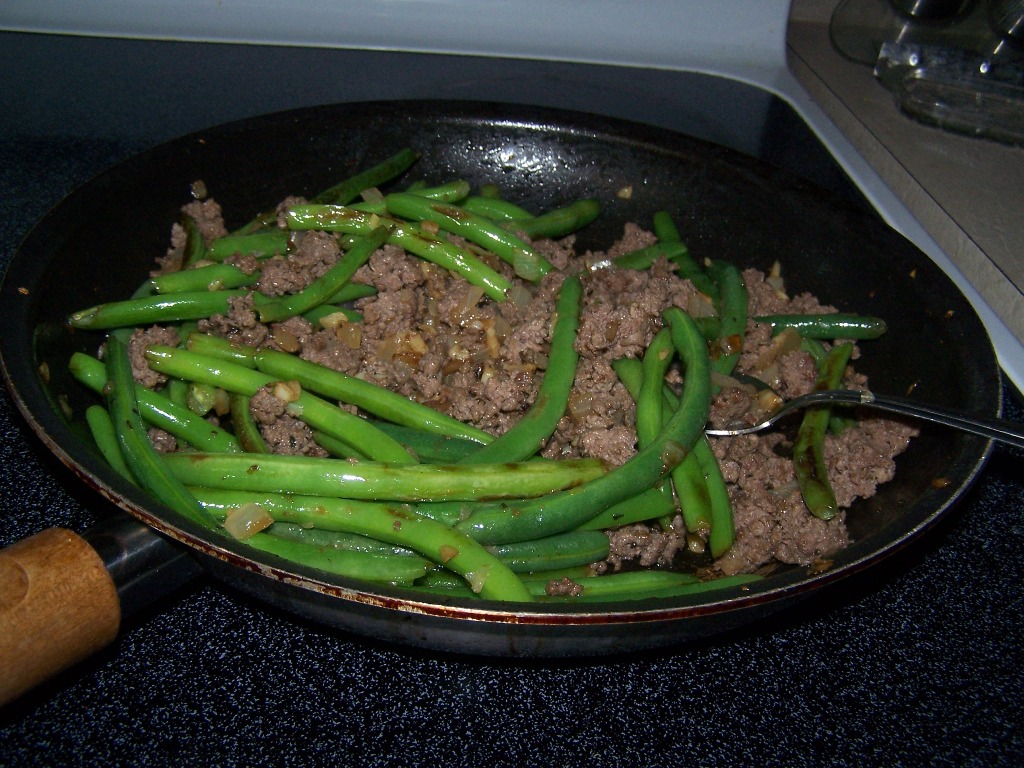
The FINISHED yummy and totally healthy dish!
Here is a recipe to one of my successful "throw it in the pan and mix it up meals" that I created yesterday. I was really happy with it and it tasted great. Another successful healthy dish. Yeah!
Only used natural ingredients keeping it totally healthy. Sstarted off with an organic onion and garlic bulb. I cut the medium size onion in half, and diced one half of the onion (putting the other half away as I didn't need it)...and cut the entire smaller garlic bulb(s) into little diced pieces, mixed them together, and threw them in a large skillet that was greased with olive oil.
Then put the diced onion and garlic in skillet with olive oil as well as about 1 teaspoon of lemon juice and mixed it all together. I turned heat on to medium stirring constantly to keep it from burning. Once onions had turned translucent, I removed skillet from heat.
Then, pulled out the above herbs/ingredients to season the dish with....Organic Lemon Juice, Sea Salt, Basil, Sage, and Freshly Ground Black Pepper. (All of the ingredients EXCEPT for the organic lemon juice were used to season the ground beef....common sense...season to personal taste. The organic lemon juice was used to add flavor to the diced onion and garlic cooking. I used about about 1 teaspoon of lemon juice.)
In a separate smaller skillet I put all natural grass fed lean ground beef in a skillet and put a small handful of the diced garlic and onion (pulling a tiny bit on a whim from the large skillet) in w/the ground beef, as well as a dash of basil, sage, sea salt, and black pepper, and mixed it together and then began cooking the meat.
While the ground beef and the garlic and onions were cooking, I quickly washed a few green beans and strained the water out in the sink and then snapped off the ends of the green beans.
Then I put green beans in skillet with now cooked onions and garlic and sauteed the green beans for about 5 to 8 minutes until they were done...they were still crunchy but done. (You really have to constantly stir the green beans and the onion and garlic to keep anything from burning at the stage....it's like constant stirring, literally.
Then, once the ground beef was done, I added it in the skillet with the green beans and the garlic and onion and mixed it in, still over the heat, for about 1 minutes before pulling the skillet off the heat. The dish is now done cooking.
Vahlah, a VERY TASTY and HEALTHY dish! I really loved it, and the house smelled sooooo gooood afterwards! :-)
Ladies Fleece Hat
After finished up the Toddler Blanket Set, I decided to go ahead and use up the giraffe fleece fabric, so the idea popped into my mind to design a fleece hat (I really like hats) and that is what I did. Here is my Ladies Fleece Hat design. It fits snug on the head and is very comfortable...so much so that after I modeled it, I forgot I had it on it was so comfy and ended up wearing it around my house for near an hour before I passed by a mirror and was like OH! :-)!
The Back View
Front View
Full Length View
Ladies and Girls Fleece Hats
FINISHED Toddlers Giraffe Blanket Set!
Full View of the unfolded completed design with the overstuffed pillow to really give the "sleeping on a cloud effect." I originally designed this for infant to toddlers, but with the overstuffed comfort pillow, it makes this design more geared for toddlers, though the blanket could still be used for newborn infants without the pillow.
The overstuffed comfort pillow up close!
The tie that I made to make this design roll up making carrying this blanket set outside of the home easy for parents.
Showing an up close view of the black Velcro used to bind the roll up function.
The complete set rolled up and ready to "take out!"
This set is for sale at: http://www.etsy.com/listing/89602597/toddlers-fleece-blanket-and-pillow-set
Subscribe to:
Posts (Atom)